Return to Version 17 Release Notes index.
The following changes apply to the Bathroom and Kitchen room systems in ArtiCAD Pro and BathCAD Pro.
Version 17 introduces the ability to specify the width and height of a texture. This would most commonly be used with tiling, but could also be used to make a view fit in a window. The procedure detailed below can be used on any texture.
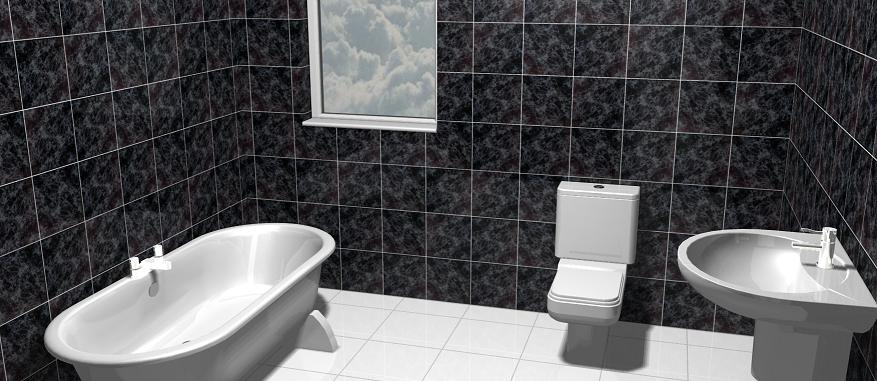
Using the above plan as an exmaple, we will change the default tile from a 260x260 to a 600x400.
Click "This Design" - "Photo Realism Colours".
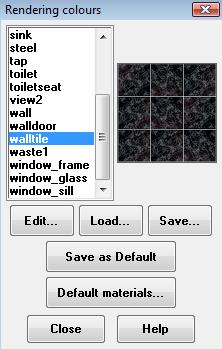
Select "walltile" and click "Edit".
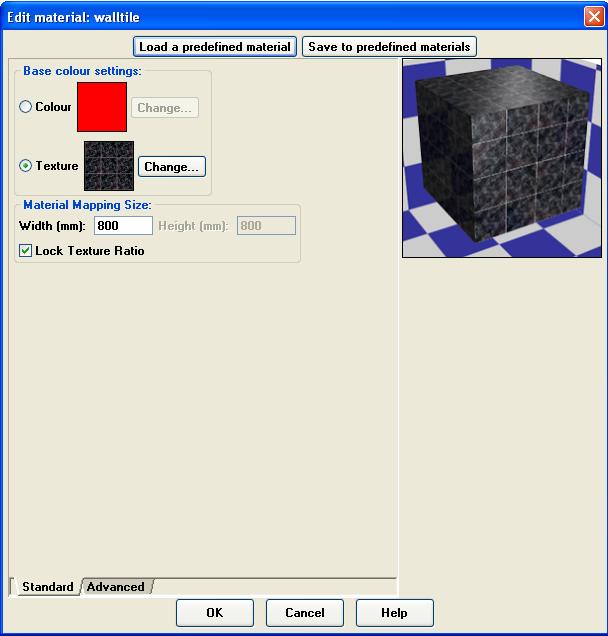
Untick the "Lock Texture Ratio" button. "Width" specifies the width of the texture, "Height" specifies the height (both in millimeters). For the texture in the example above, we want each individual tile to appear 600 wide by 400 high. The texture shows three tiles across, so the texture width will be 3 x 600 = 1800. The texture is three tiles high, so the texture height will be 3 x 400 = 1200.
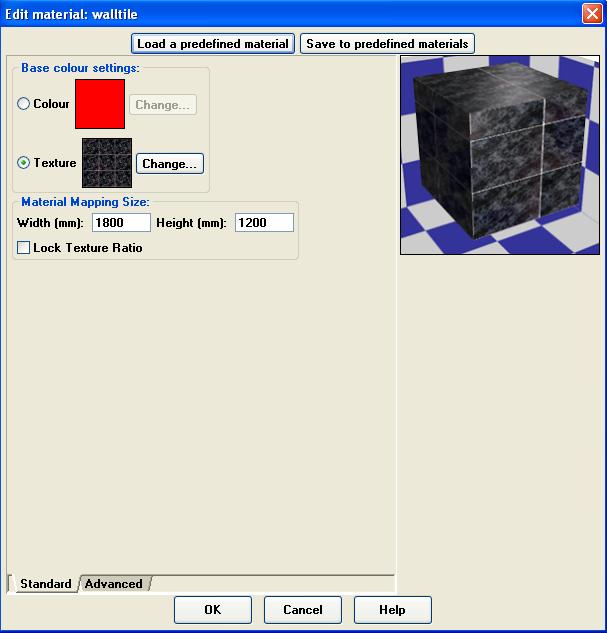
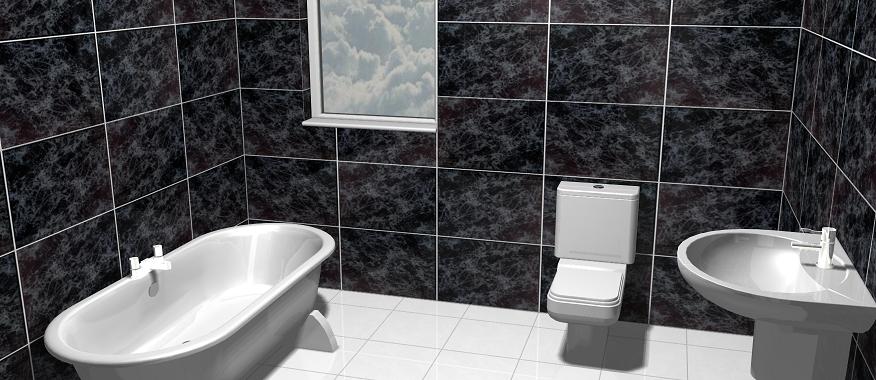
Alternatively, to show a 400x600 tile, swap the values around i.e. texture width 1200, texture height 1800.
Return to top.
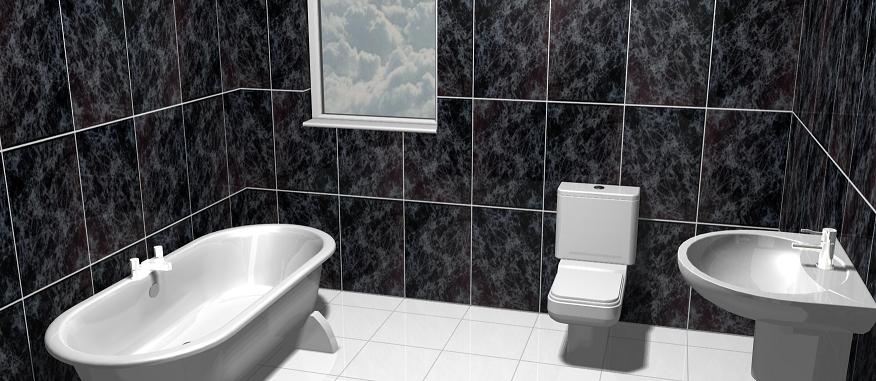
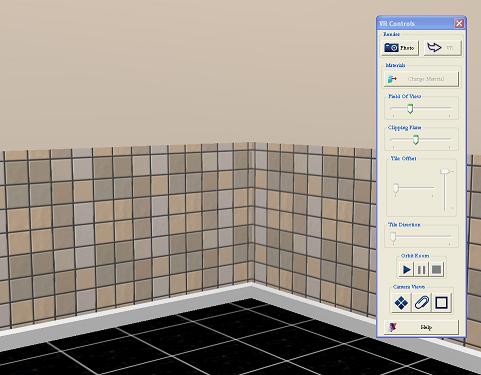
This new feature, available in VR-Pro, allows you to change the start point of the tiling on a wall. See VR-Pro for details on using VR-Pro.
Using the above room as an example, we will move the wall tiles so they finish on a whole tile at the top of the tiled area, and also start from a whole tile in the corner. We will also move the floor tiles so they start on a whole tile against the wall.
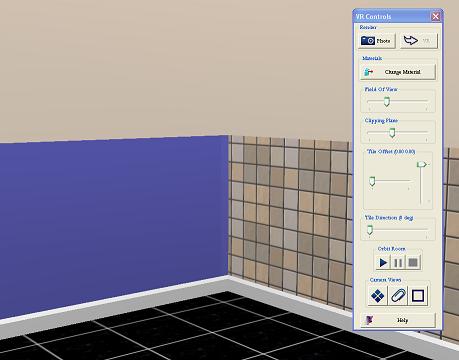
Select a tiled section by right-clicking on it. The selected area will go blue.
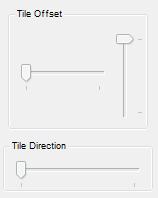
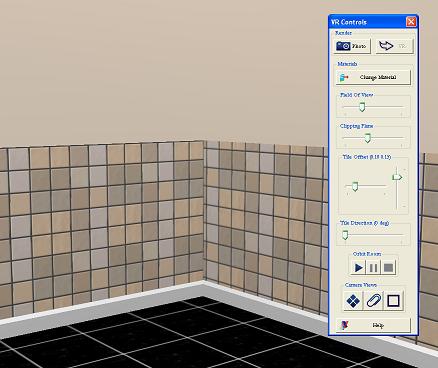
Use the "Tile offset" sliders to adjust the tiles on the wall.
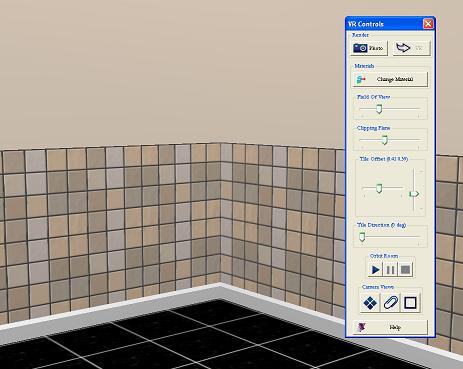
Repeat for the second wall and floor.
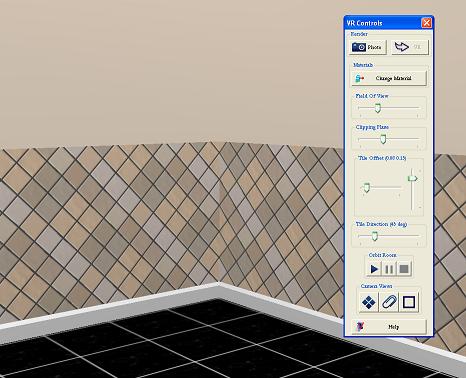
You can also change the tiling direction.
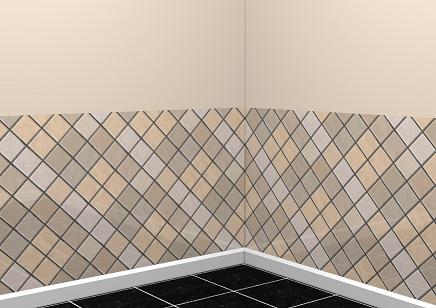
Once you have made the adjustments in VR-Pro, you can do a Photo Realistic or HD render.
Return to top.